Category Archives: Snowboard Gear

2B Snow Mask

By: Scott B

Derek over at 2B Therapy sent me one of their 2B Snow Masks to test out and see what I thought.   When he first emailed me a link to the product, I was impressed as soon as I saw it. One of the things I hate about some masks is how they have to be wrapped so tight around your face – this one connects right to your goggles.
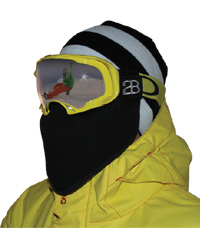
Last week I was going out snowboarding and it was going to be 9 degrees at the base and -4 at the peak, so I figured it was a perfect day to test the mask.  The first mistake I made was not fully reading the directions on how to attach the mask to my goggles. Even though it looks super simple, attaching the nose piece correctly is key.  So after a few runs with the nose piece not attached correctly, I have to say I was still impressed.

After I attached the mask correctly, I never had any issues with fog and never once did it feel like it was going to fall off.

So here is my take:

What I liked:

1.  The mask was not directly wrapped around my face, so I got that breathable feel.

2.  “No Drool Face” – We have all had those makes that after a few runs leave your face wet… not this one.  One the package it readss “No Drool Face” and it is dead on.

3.  Easy to take on and off.

4.  Kept wind and kick up snow/ice out of my face.

What I did not like (or this product was not good for):

1.  It was not warm enough on the lift. This mask isn’t wrapped very tight (a good thing), but it lets the wind on the lift get through the side to make things a little too cold.

Overall I would recommend you check out this product as I really liked it when I was riding down the mountain. The mask kept the wind out of my face and the “No Drool Face” was clutch!   If you are like me and want something warm for the lift ride up, get a neck warmer or zip your jacket all the way up for the lift ride.

Check them out at:

http://2BMask.com
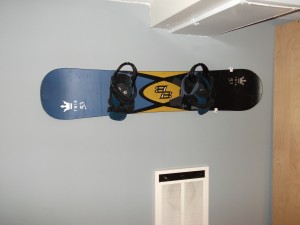
Rixon Boarddock

By Scott

The team over at Rixon Boarddock sent us a few of their snowboard hang systems so that we could test them out and write a review.  Before Rixon had emailed me, I had never heard of them or their product, but was intrigued once I looked at their site.

About 17 years ago when I got my first snowboard, I treated my board like my baby and would only leave it in my bedroom.  I simply stood it up against the wall and would not let anyone touch it.   So when I saw that Rixon had created a product to hang my board on the wall I was a little excited and could not wait to get Boarddock’s.

So when the package finally arrived and I opened up the Boarddock  package I have to admit I was a little suspect on how the 2 little L shapped plastic pieces where going to be able to hold my board on the wall and easily allow me to take it on and off.

How hard was it to install?  Here is my Step by Step instructions:

Step 1:

The small package from Rixon Boarddock included 2 L shaped plastic brackets, 2 screws, and 2 screw plugs for the wall (to be able to hang the board in plaster and to not hit any studs in the wall).  The package does not come with any instructions, but rather directs you to their website where they have 3 sets of directions for hanging your board to the wall; Vertical, Horizontal or Diagonal.

Step 2: After I chose to hang the board horizontally, I need to get a few tools and the board I was going to hang.  The tools required are pretty basic that almost everyone has in their house; Philips screwdriver, Hammer, Small Level and then something to start a small hole like a nail.  The board I chose to hang was the one I talked about above, the 1993 Burton Twin ( one of the first Burton Twin Tip Boards designed).

Step3: Fasten the bottom bracket first;  It took about 2 minutes and I was able to fasten the bracket without any issues and did not need a drill.

Step 4: Set your board on the bottom bracket, get your board to sit level so that you can figure out where you want the top bracket, and then mark your spot.  Now the top bracket has to be no more than 4 inches apart from the bottom bracket. Also, these brackets are attached to one end of your board and not in between the bindings.

Step 5: Fasten the top bracket.  After I picked the spot to fasten the board, I put the board down and in about another 2 minutes I fastened the top bracket to the wall.

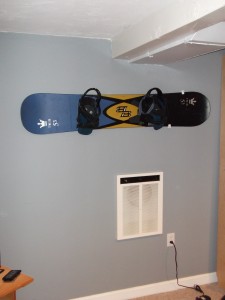
Step 6: Hang the Snowboard to the wall.  You need to put the board in at an angle so that you can get around the shaped ends of your snowboard.  The board will then slide between the 2 L shaped fittings very easily.  You will be amazed how level and sturdy your board will be sitting on your wall.

Overall I was really impressed with the Rixon Boarddock.  Not just because they sent the brackets to me for free, but because they are super easy to set up.  Now my board looks pretty sweet on the wall.  From start to finish it took me about 10 minutes to mount the brackets and get my board hanging on the wall.  Not too shabby for 2 small brackets!!!

Check them out for your self at  RixonTM.com

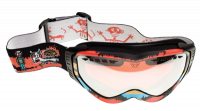
Gordini GASP Goggles featured artist Mikey Welsh

By Scott B
BoardReviews.com

The team over at Gordini sent us some artist inspired goggles to review. The ones we received are the Gordini GASP, with featured artist Mikey Welsh.  At first, I thought they might be too artistic for me. After I tried them on, I actually liked the way they look and feel.  I know…it’s snowboarding and not a fashion show, but most of you have to admit that you care about the way your gear looks.

To actually test out the Gordini GASP Mikey Welsh goggles I could not just try them on and say they looked good and fit well, I had to take them to the mountain and give them a ride. On a typical riding day, I hit the lift line, put on my goggles and  leave them on until I go inside for a break.
The first thing I noticed was that I really liked the view from the gold mirrored lens. This was the first time I used a pair of goggles with gold lenses.  The day was pretty bright and there was a nice glare off the white snow, so the view was really crisp and not too dark.  I klike goggles that have a clean view, stay tight to my face and do not allow in any excess air or fog.

3 factors I used in evaluating at these goggles:

  • View : On this bright day, these goggles were sweet. I had a clear view. I actually think on a cloudy, snowy day these would hold up pretty well.  If you like to board at night, I’m not sure these would work.
  • Fit and Air Intrusion: These goggles fit my face pretty well. They weren’t too big or small. I didn’t feel any excess draft while boarding or on the lift.
  • Fog: These goggles didn’t fog up once all day. For me, if a pair of goggles fogs up, I will typically try to return them right away.  With all the technology out there you have to be able to make a pair of goggles that doesn’t fog.  But on the other hand… you have to put on the goggles correctly and not blame fog on design if you kept dropping them in the snow or keep taking them on and off on the mountain.

Overall, I was really impressed with these goggles.  I have to say I probably would not have picked these up myself if I was at a store, so I am really glad they sent me a pair to test.

Check out the Gordini GASP featured artist Mikey Welsh

i360 Street Infused Hat Beanie

By Scott B
BoardReviews.com

The team over at i360(tm) sent me a Street Infused Beanie Hat to test out and review. For those of you who are not familiar with i360 the make wireless hats and headbands that fit your iPod so you can listen to music while snowboarding, skating or even playing basketball.    When I checked out their site iThreSixty.com I wanted to learn a little more about the product before I actually tried it out on the mountain.  The site describes the hats as “fashionable and musically functional headwear designed to eliminate messy wires and bulky headphones while also delivering top-notch sound.  The headwear uses a patented technology that includes a washable 3-jack wiring assembly and internal pockets allowing listeners to connect their iPod to custom i360 speakers, all hidden from view.”

For me to test this product it was a no brainer, I am a fan of listening to my old school iPod shuffle while snowboarding all the tim.  So when I got the hat in the mail the first thing I did was try it on and see if it fit my head and checked it out to see if it looked good on….. passed both!  The next test was to take it to the mountain and try it out.  When I typically ride I use an iPod shuffle and a pair of skull headphones, I set them up so that the iPod is in my inside front pocket and I try to run the headphone down my back and under my arm (yeah a little bit of a process to make perfect).

When I got to the mountain I threw in the shuffle hit the power button and put on the hat.   I have to say I was really shocked at how the speakers worked, I could hear the music almost perfectly.  The inside of the hat also lets you move the speakers around, but when I put it on it was good for me.  The next two test were going to be how it was on the lift with the wind and noise and then how it would be when I was cruising down the mountain.  The lift ride was no problem, I could hear the music perfectly and the hat kept my head warm.  Now when I use headphones and ride I will only have one ear bud in so I  can still hear someone coming up on me or even to just listen for some runaway skier.  With the i360 beanie I had no problem hearing people come up on me and the music was really clear.

Overall I have to say I was really impressed, this hat was warm and speakers worked really well.   Also this was the first time I have boarded in a while where I was not messing with my ipod the whole time, so I think I actually enjoyed my day of riding even more.  Now not to just pump up a product because it was free I had 3 little issues;

  1. The hat I was sent did not fit my iPod so I used the old school shuffle, it was not a perfect fit but it worked.
  2. Even though the hat fit and it was warm, if it was a little bit bigger I think it would have been perfect (I like a hat to pull down low on my neck).
  3. Once I showed this hat to my little nephew who skis he kept trying to steal it from me.

If you want to buy one the team at i360 is offering $5 off for BoardReview readers.

Visit:   iThreeSixty.com

Promo code:  blogi360

Kombi TcZ Gloves

By Scott B
BoardReviews.com

Our friends at Kombi sent some Kombi TcZ gloves over to the BoardReviews.com team for our expert review. I can tell you that I have been Skiing and Snowboarding for over 20 years and I have never worn a custom ski glove. I have buddies who swear by mittens, but I have always been a fan of having the control of my fingers to easily get my snowboard bindings on and off quickly.

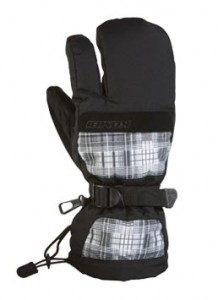
In testing the Kombi TcZ gloves a big thing for me was how much control I was going to have with these gloves on, and whether I ‘d have to keep taking them off every time I got off the lift to crank in my bindings (Yes, I was being a pessimist, but it was super cold in New England this weekend). So I have to tell you – these gloves are pretty sweet and I did not have one issue. First, these gloves are not mittens. They are called ‘trigger finger gloves,’ or as I have been calling them all weekend, ‘lobster claws.’ The gloves are really warm and I was a huge fan of having the index finger and thumb separated. The other 3 fingers are grouped together. Control is a big deal for me. I think having the index finger and thumb separated was huge for being able to easily snap and crank down my bindings.

The features of the TcZ glove are pretty crazy. The tag reads ‘windproof, waterproof and highly breathable.’ Having seen this on many gloves before, I though it was just a standard tag line that glove manufacturers added. I bet we can all remember our fingers half frozen by the end of the day. The TcZ gloves held up really well against the elements. I have never personally felt wind as an issue on the mountain, but ‘waterproof and breathable’ are big for me. I’m happy to report that my hands felt good at the end of the day and were not frozen.

Lastly, the ‘nose wipe’ is pretty cool. I won’t get into too much detail here because you don’t need a blow by blow of me wiping my nose. Just try this feature. It’s a lot more useful than I ever expected.  One thing this glove is missing is a glove leash. I have historically purchased gloves with a leash. They’re convenient when riding on the lift and taking your gloves off. Outside of that one little feature, I really liked these gloves.

Check out these glove:

Kombi TcZ Glove