By Scott
The team over at Rixon Boarddock sent us a few of their snowboard hang systems so that we could test them out and write a review. Before Rixon had emailed me, I had never heard of them or their product, but was intrigued once I looked at their site.
About 17 years ago when I got my first snowboard, I treated my board like my baby and would only leave it in my bedroom. I simply stood it up against the wall and would not let anyone touch it. So when I saw that Rixon had created a product to hang my board on the wall I was a little excited and could not wait to get Boarddock’s.
So when the package finally arrived and I opened up the Boarddock package I have to admit I was a little suspect on how the 2 little L shapped plastic pieces where going to be able to hold my board on the wall and easily allow me to take it on and off.
How hard was it to install? Here is my Step by Step instructions:
 Step 1:
The small package from Rixon Boarddock included 2 L shaped plastic brackets, 2 screws, and 2 screw plugs for the wall (to be able to hang the board in plaster and to not hit any studs in the wall). The package does not come with any instructions, but rather directs you to their website where they have 3 sets of directions for hanging your board to the wall; Vertical, Horizontal or Diagonal.
Step 2: After I chose to hang the board horizontally, I need to get a few tools and the board I was going to hang. The tools required are pretty basic that almost everyone has in their house; Philips screwdriver, Hammer, Small Level and then something to start a small hole like a nail. The board I chose to hang was the one I talked about above, the 1993 Burton Twin ( one of the first Burton Twin Tip Boards designed).
Step3: Fasten the bottom bracket first; It took about 2 minutes and I was able to fasten the bracket without any issues and did not need a drill.
Step 4: Set your board on the bottom bracket, get your board to sit level so that you can figure out where you want the top bracket, and then mark your spot. Now the top bracket has to be no more than 4 inches apart from the bottom bracket. Also, these brackets are attached to one end of your board and not in between the bindings.
Step 5: Fasten the top bracket. After I picked the spot to fasten the board, I put the board down and in about another 2 minutes I fastened the top bracket to the wall.
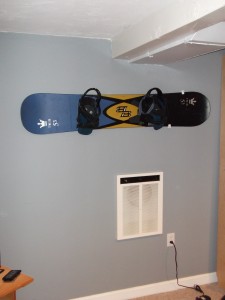
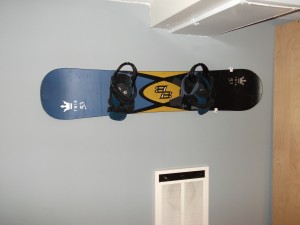
Step 6: Hang the Snowboard to the wall. You need to put the board in at an angle so that you can get around the shaped ends of your snowboard. The board will then slide between the 2 L shaped fittings very easily. You will be amazed how level and sturdy your board will be sitting on your wall.
Overall I was really impressed with the Rixon Boarddock. Not just because they sent the brackets to me for free, but because they are super easy to set up. Now my board looks pretty sweet on the wall. From start to finish it took me about 10 minutes to mount the brackets and get my board hanging on the wall. Not too shabby for 2 small brackets!!!
Check them out for your self at RixonTM.com

That thing is sick. I’ve done that with my guitar but never with my board!
Those Rixon things are great, I’ve used them to mount my 3 snowboards.
I ordered 2 sets immediatly. Very quick and correct delivery. Easy to install… I recommend it to everyone! =)
Nice to hear that you like our system!
More information and videoreviews can be found on our Facebook fanpage:
http://www.facebook.com/#!/pages/Rixon-Boarddock/15713039998
Absolute great system!